Introduction
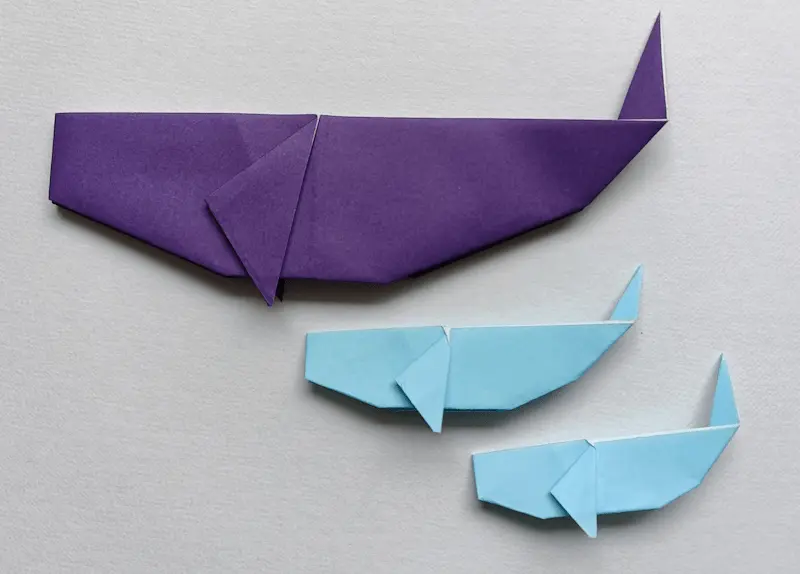
Making paper animals is always exciting, and today you will create a gentle ocean giant. This easy origami whale is simple, fun, and perfect for beginners.
With just a few folds, a flat piece of paper turns into a friendly whale. You can even draw a little eye and a water splash to bring it to life. This easy origami whale is great for playtime or decorating your room with sea creatures.
Let’s dive in and start folding!
Difficulty Level
Level 1 (Very Easy)
How long does it take?
5 to 7 minutes
Materials
- 1 square sheet of paper (15 cm x 15 is best)
- A flat surface to work on
Step-by-Step Instructions
If you are new to origami, learning basic folds will make this easier.
👉 Click here to master basic folds first!
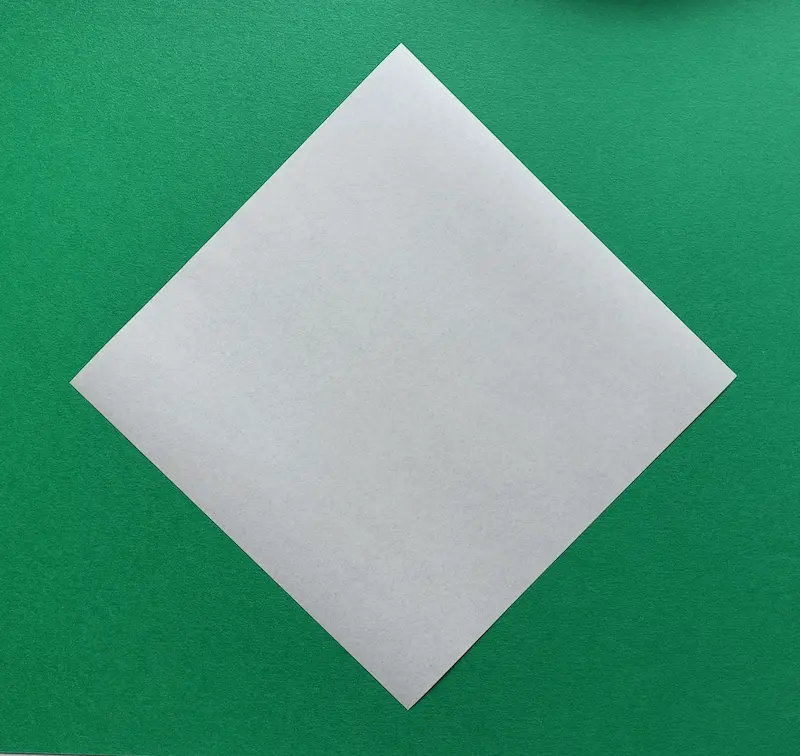
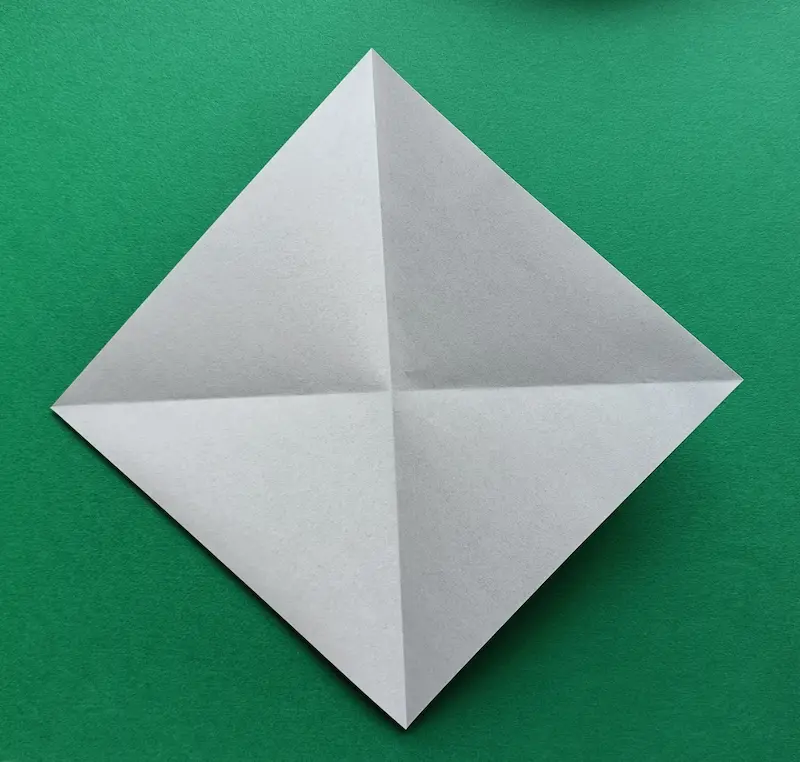
1. Place your square paper on the table like a diamond.
2. Make 2 creases.
3. Fold the bottom to the center crease.
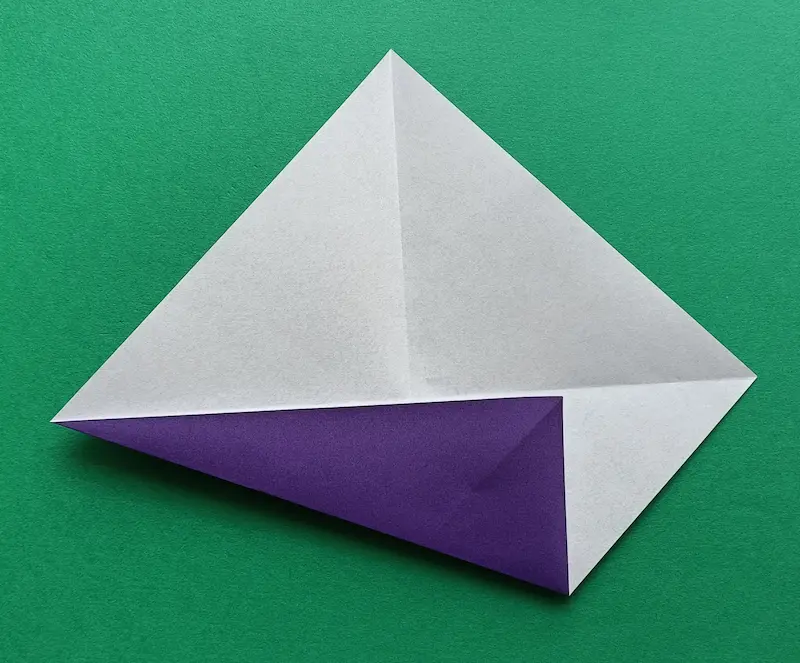
4. Fold the top to the center crease.
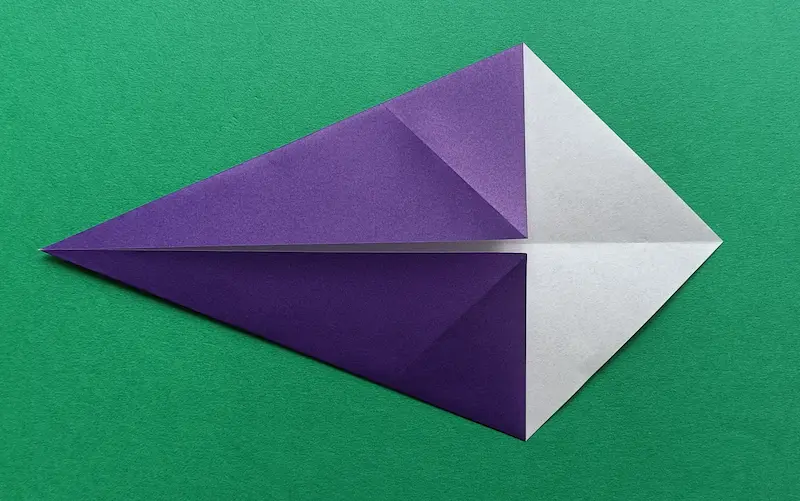
5. Fold the left corner over to meet the right corner.
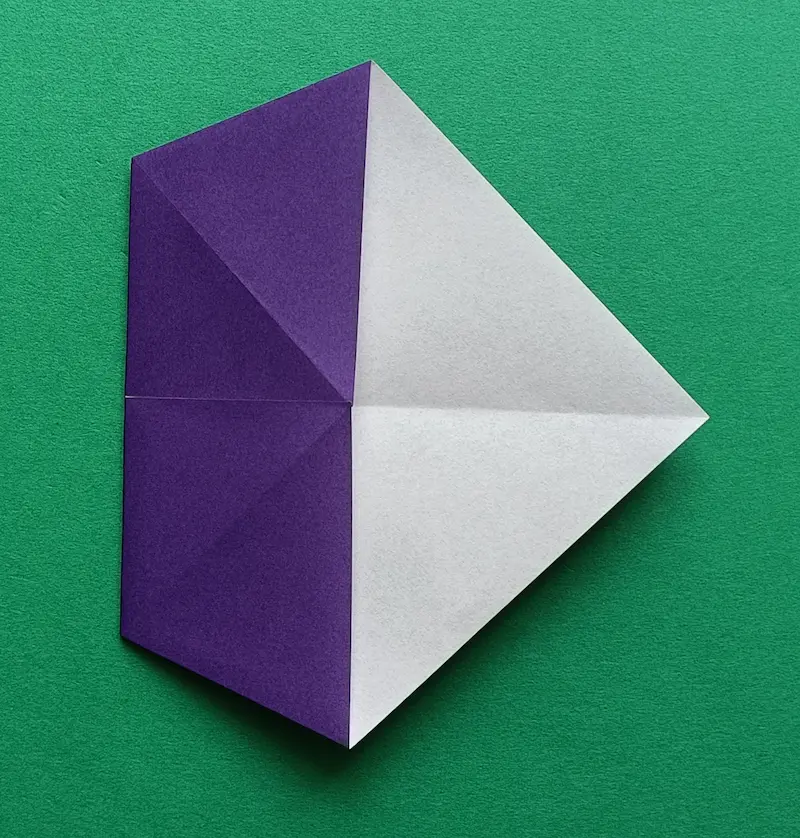
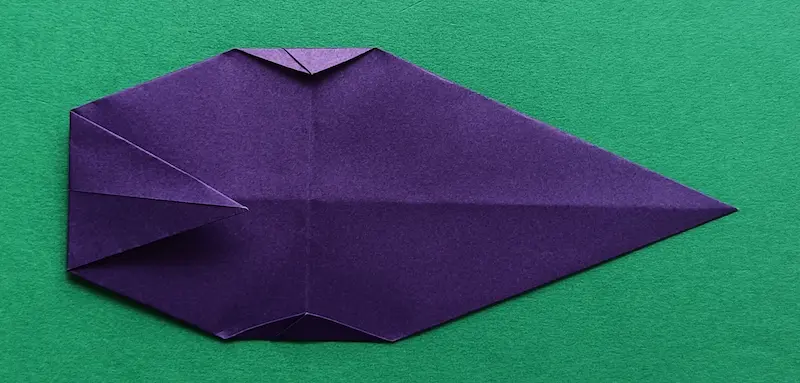
6. Put your finger in the bottom pocket, and fold it to meet the center crease.
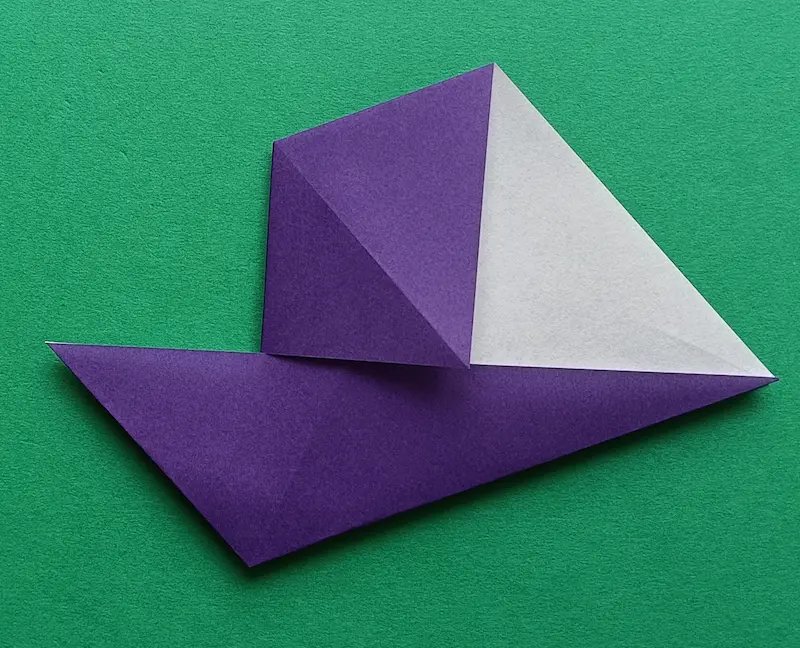
7. Put your finger in the top pocket, and fold it to meet the center crease.
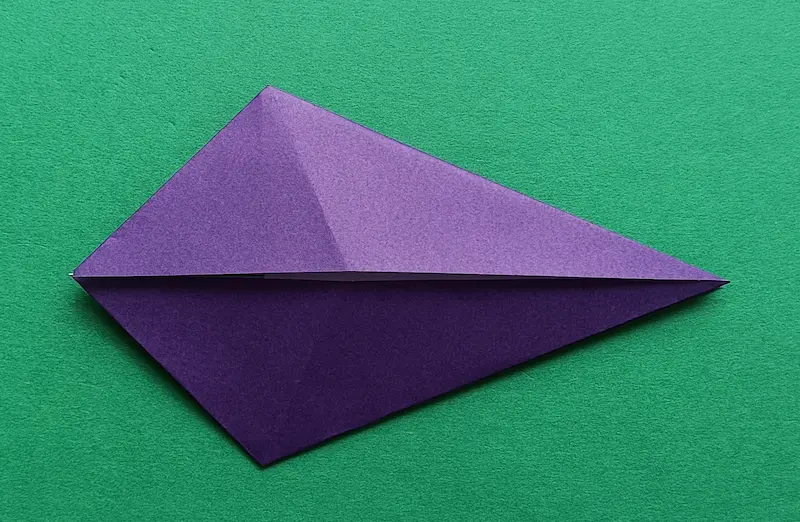
8. Fold the top layer to the left.

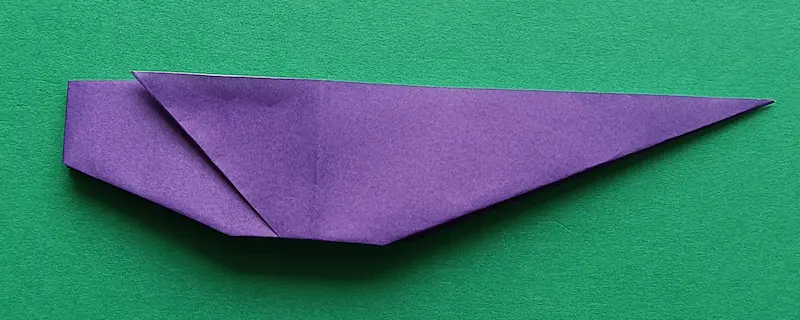
9. Fold the left corner to the right.
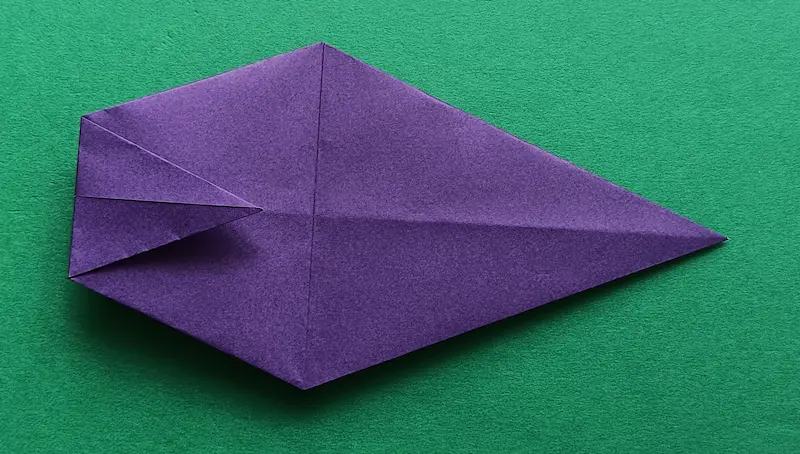
10.Fold the bottom corner up a little bit.
11. Fold the top corner down a little bit.
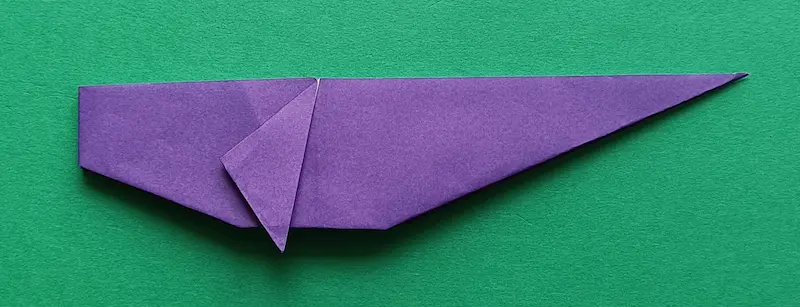
12. Fold the bottom half up.
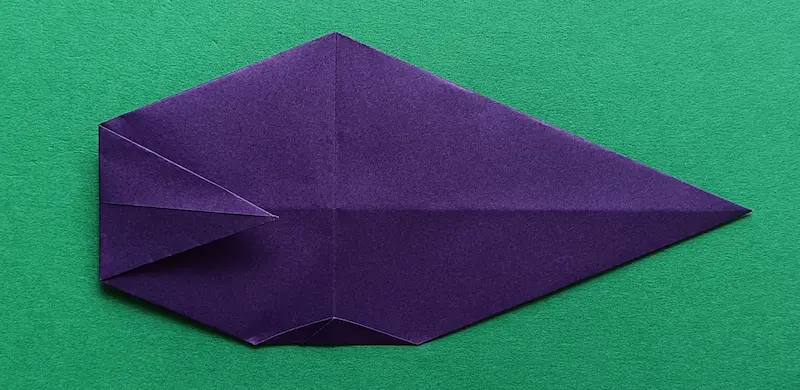
13. Fold the fin down. (Do the same on the back.)
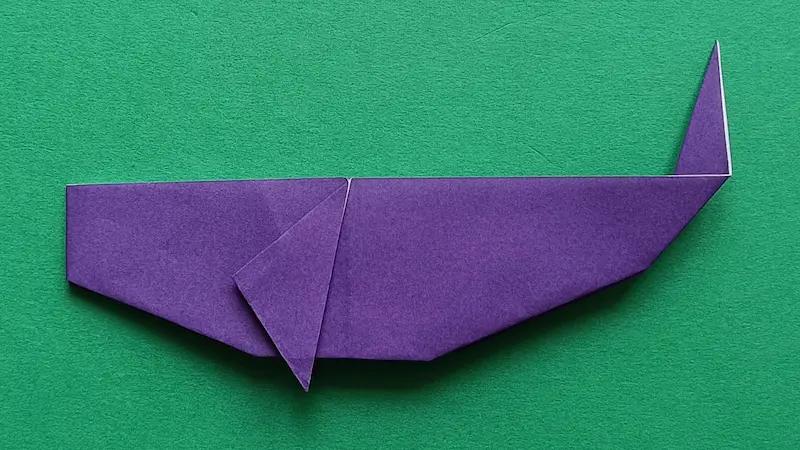
14. Fold the right corner up and back a little bit.
Why This Origami is Good for Kids
- Whales are huge ocean animals, so this craft can spark curiosity about sea life and underwater worlds
- The tail shape helps children notice how whales move through water with strong, wide fins
- It’s a great way to start talking about oceans, waves, and marine habitats while playing
Tips for Success
- Press each fold firmly with your finger to keep the shape sharp
- Try using blue or gray paper to make your whale look more realistic
- Draw a small waterspout above the head to make your whale more lively
Common Mistakes
Q: It’s hard to make the small folds in steps 10 and 11.
A: Don’t worry if it’s not perfect! Use your fingernails to make a sharp crease for small parts.
Fun Ideas to Try
- Create a whole ocean scene with multiple whales and waves
- Add stickers or glitter to make a magical sea whale
- Make tiny baby whales using smaller paper
- Turn your whale into a story character and give it a name
- Tape your whale to a stick and pretend it is swimming through the air
Fun Fact
Whales are the biggest animals on Earth, but they breathe air just like us!
In Japan, we have many traditional stories about whales. In some coastal towns, whales are even respected as “Gods of the Sea” who bring good luck to fishermen!
Conclusion
You just made your very own paper whale—nicely done! It’s amazing how a few folds can turn paper into an ocean animal.
Keep practicing and try making a whole sea collection. The more you fold, the more fun shapes you will discover.
Try More Origami
Want to make more ocean friends? Try these next!