Introduction
Do you want to make an easy origami samurai helmet today? This fun paper project is perfect for kids and beginners everywhere! You only need one square sheet of paper to create a cool Samurai helmet.
Making paper art is a wonderful way to play and learn. This traditional Japanese design looks amazing and is very easy to fold. Let us get started and make your very own paper helmet!
Want to explore more others?
Check out our easy origami others collection.
Difficulty Level
Level 1 (Very Easy)
How long does it take?
5 to 7 minutes
Materials
- 1 square paper (15 x 15 cm is best)
- A flat surface to work on
Step-by-Step Instructions
If you are new to origami, learning basic folds will make this easier.
👉 Click here to master basic folds first!
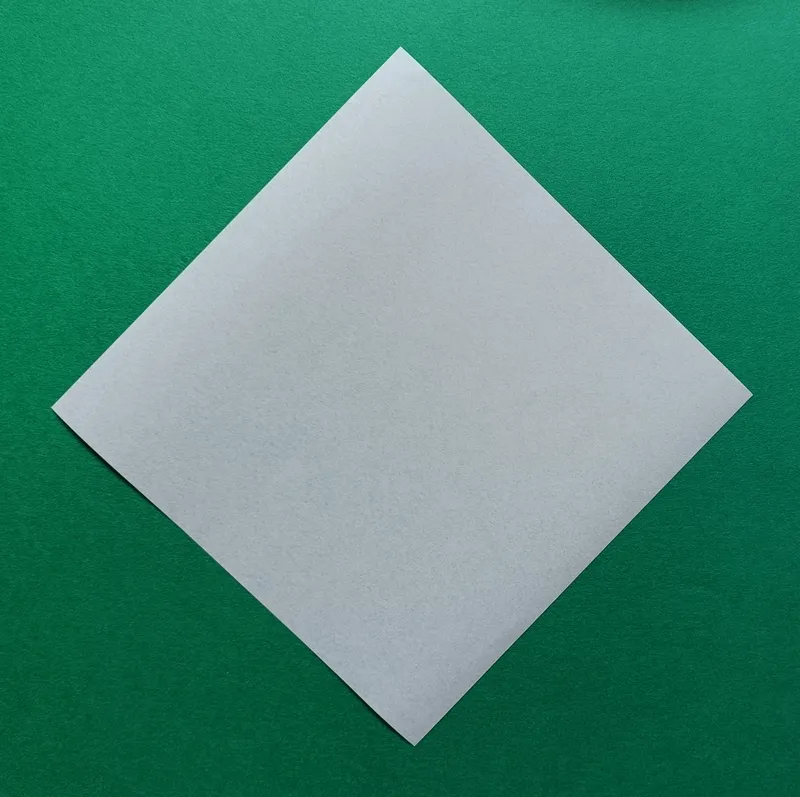
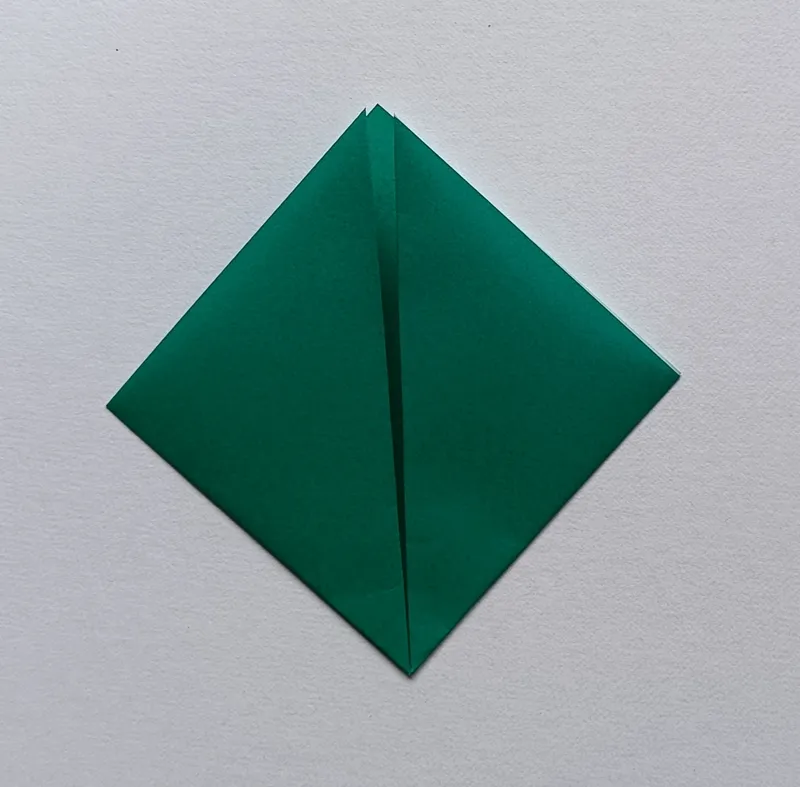
1. Place your square paper on the table like a diamond.
2. Fold the bottom corner up to meet the top corner.

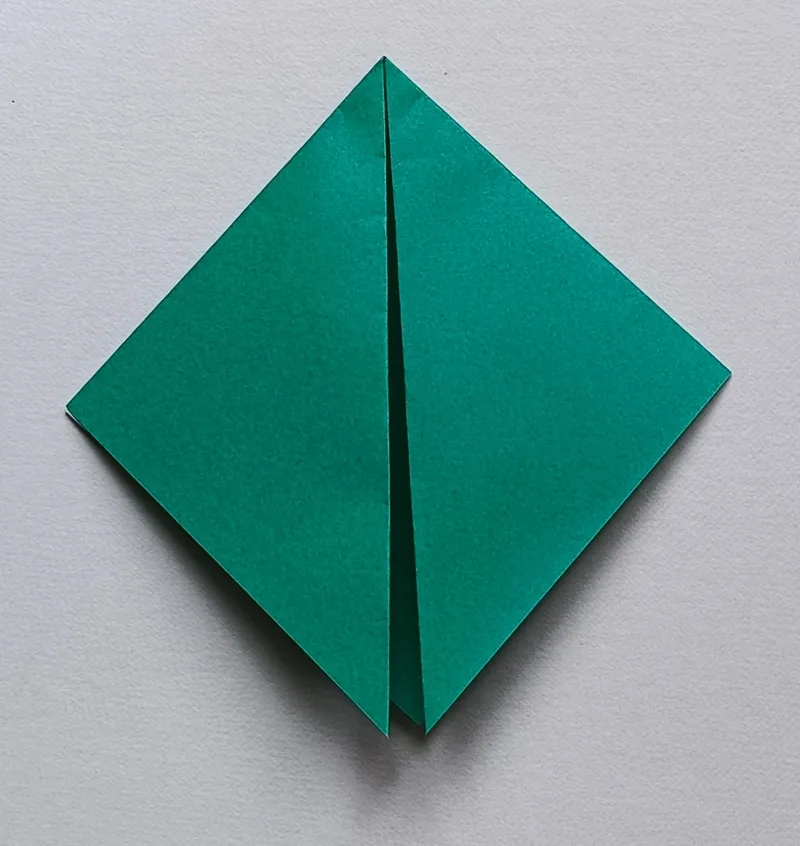
3. Fold the left corner up to meet the top corner.

4. Fold the right corner up to meet the top corner.
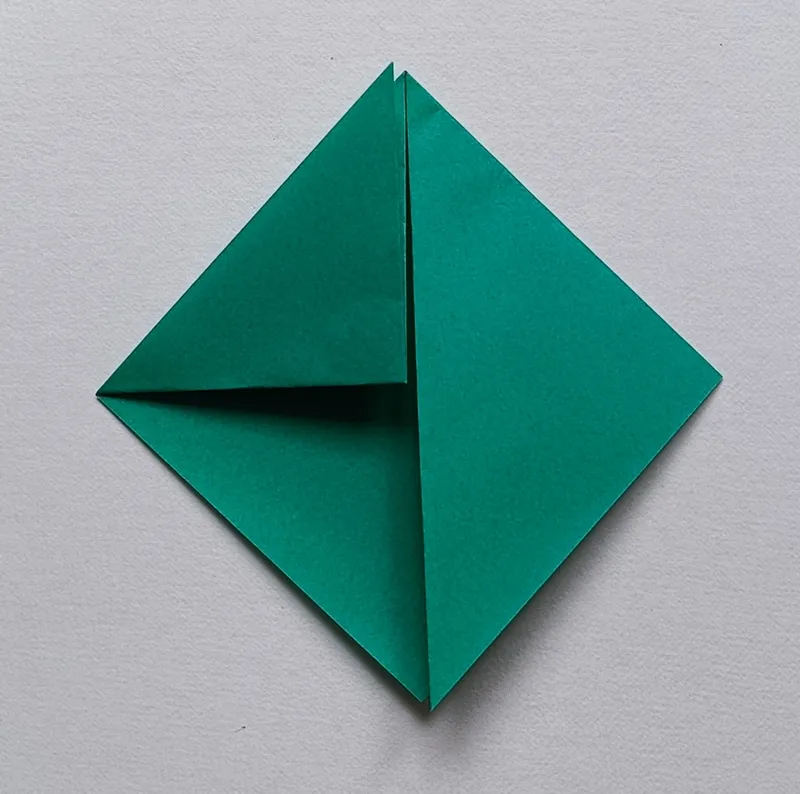
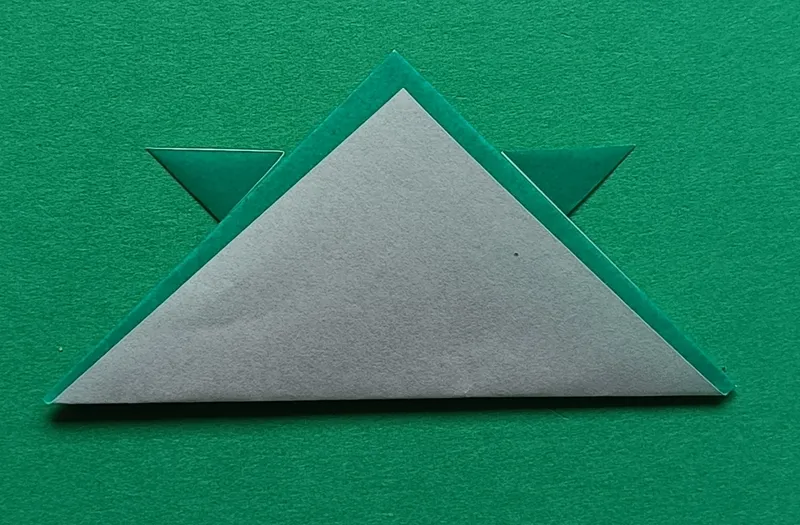
5. Turn it upside down.
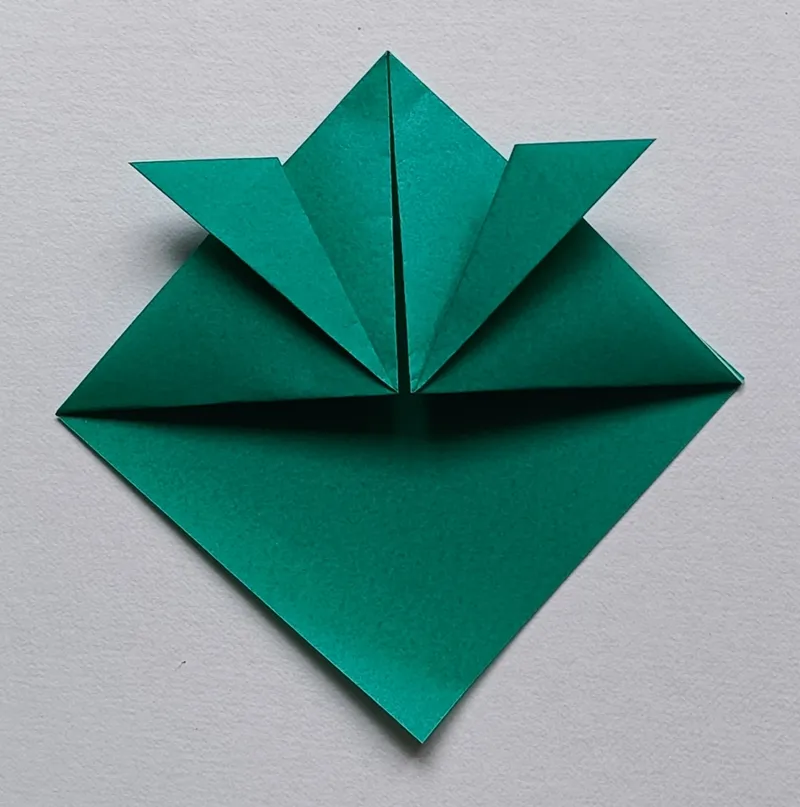
6. Fold the bottom left flap up to the top corner.
7. Fold the bottom right flap up to the top corner.
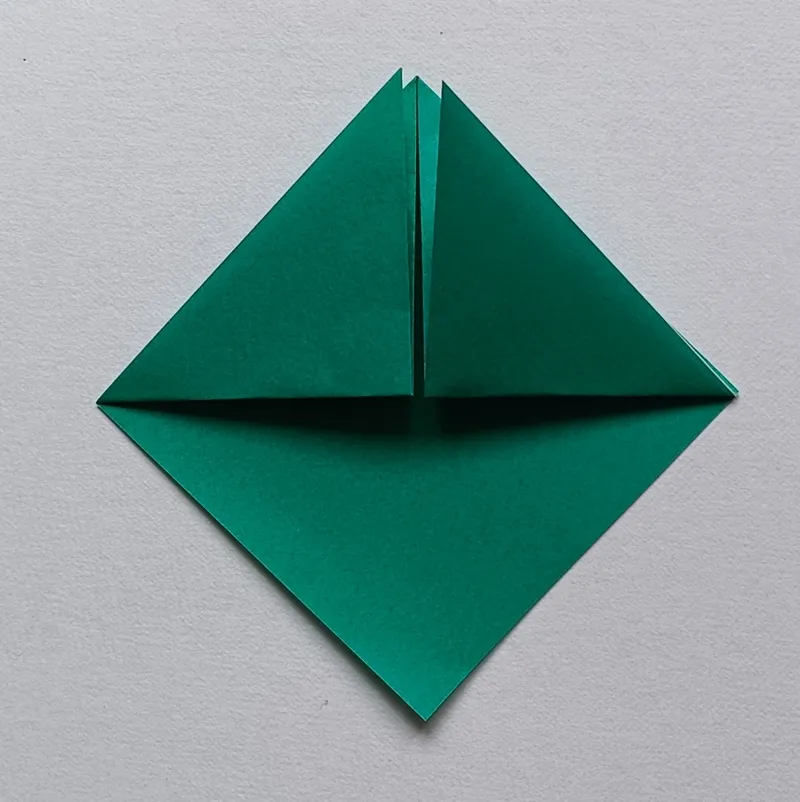
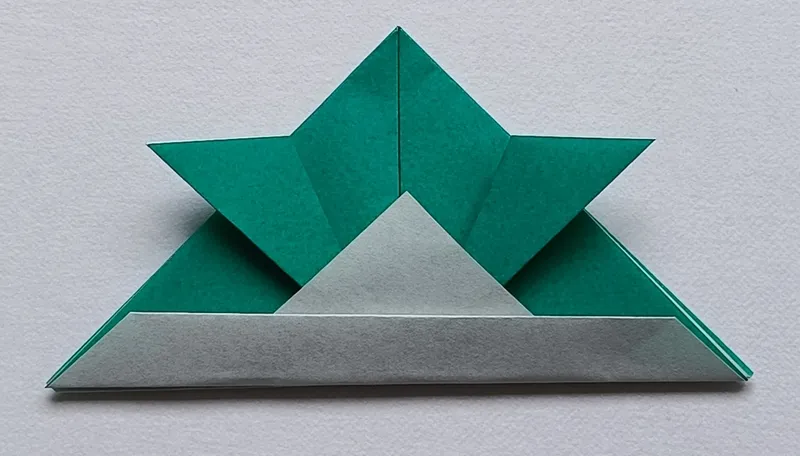
8. Fold the same left flap up and out to the side.

9. Fold the same right flap up and out to the side.
10. Take the top layer of the bottom corner and fold it up.
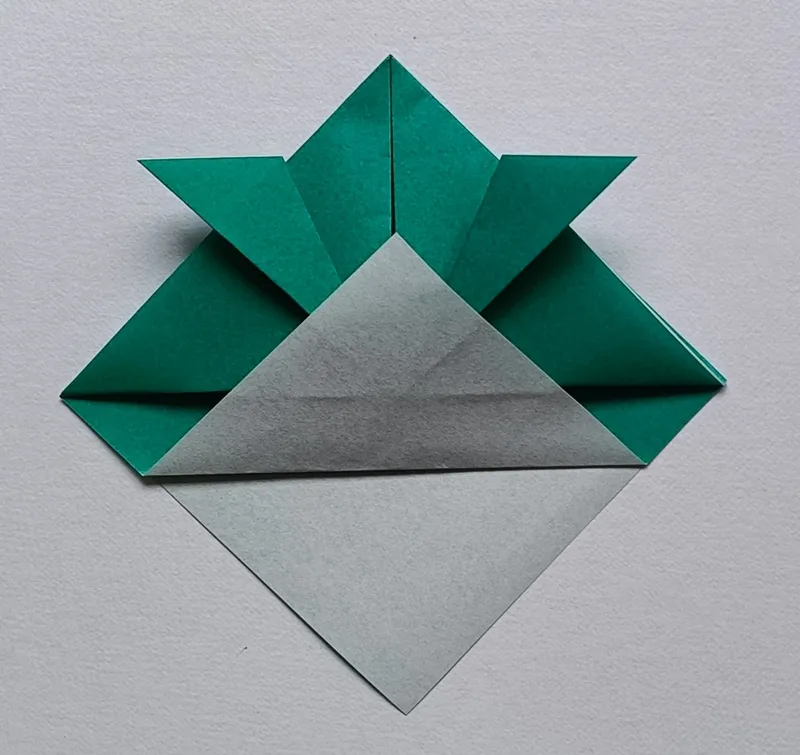
11. Fold the same bottom edge up again to make a band.
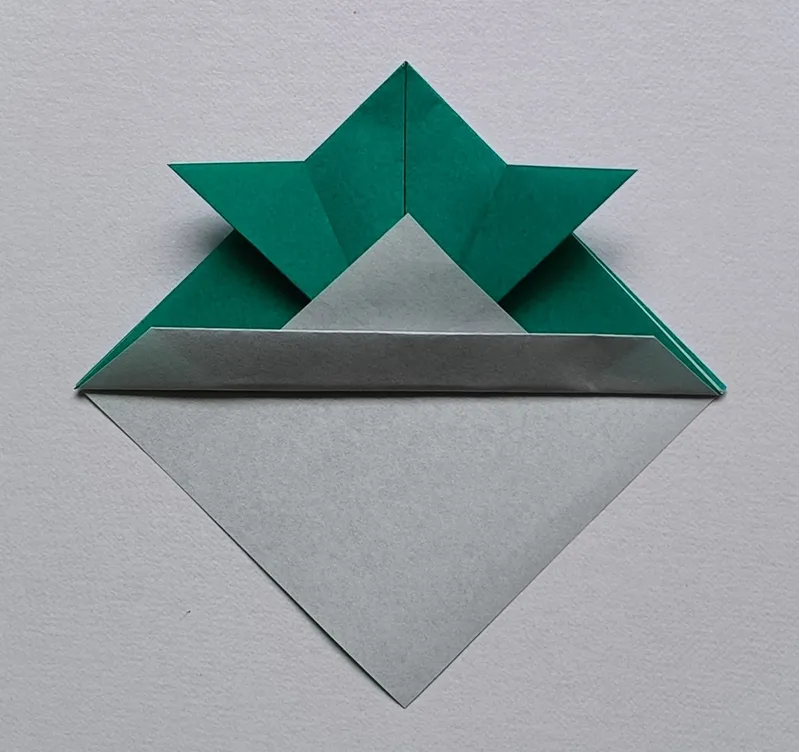
12. Turn it over.
13. Fold the remaining bottom corner up.
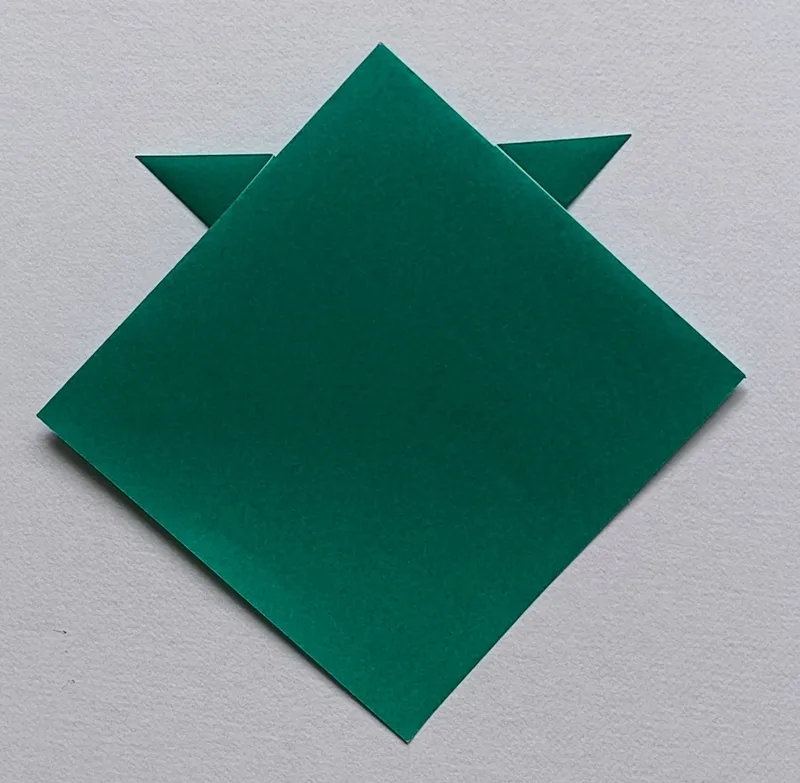
14. Turn it over.
Why This Origami is Good for Kids
- The helmet shape connects to stories of ancient warriors, making playtime feel like an adventure.
- Kids can wear the finished piece, turning a simple craft into a costume.
- Decorating the helmet lets children design their own “armor” with colors and symbols.
Tips for Success
- Use bigger paper if you want a hat that fits your head.
- Press each fold firmly so the helmet keeps its shape.
- If the corners don’t match perfectly, adjust them before pressing down.
- Add a bold crest or symbol in the center to make it look more like a real samurai helmet.
Common Mistakes
Q: I’m stuck because I don’t know which side is up or which way it faces.
A: Try looking at the color of the paper. Compare your paper with the photo carefully.
Fun Ideas to Try
- Draw fierce eyes or patterns on the front to make a warrior face.
- Make several helmets and pretend you are a team of samurai heroes.
- Use shiny or gold paper to create a royal-style helmet.
- Turn it into a mini display by placing it on a toy figure.
- Add paper “horns” or decorations to create your own unique design.
Fun Fact
Real samurai helmets were called kabuto, and many had large, decorative horns or crests to make warriors look powerful and easy to recognize.
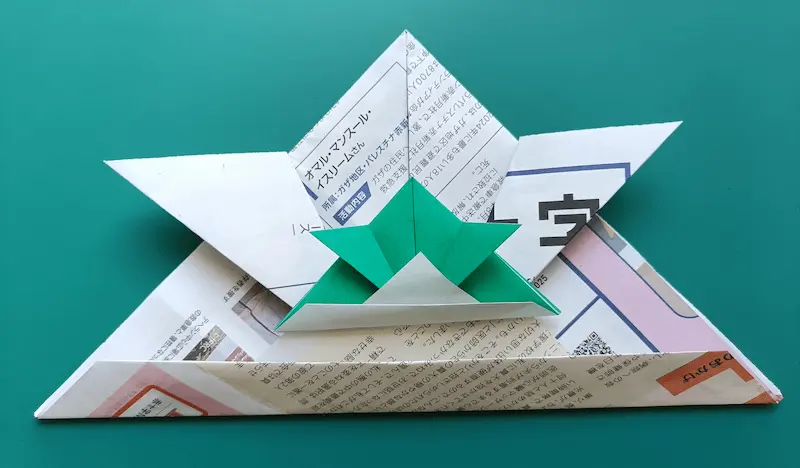
In Japan, we celebrate Children’s Day on May 5th. Families display samurai helmets to wish for children to grow up strong and healthy. Many Japanese children fold big helmets using newspapers and wear them as hats!
Conclusion
You did it! You turned a simple piece of paper into a bold samurai helmet. That’s something to be proud of.
Keep practicing and try new designs. Origami is full of surprises, and each model you make brings a new idea to life.
Try More Origami
Let’s try another fun and useful origami!