
Introduction
Have you ever wanted to fold something you can actually use? Today, you will learn how to make an easy origami cup that can hold small items or even a little water.
This simple project is quick and fun. You can use your paper cup for snacks, tiny treasures, or pretend play. It’s a great way to turn a flat piece of paper into something useful!
Want to explore more others?
Check out our easy origami others collection.
Difficulty Level
Level 1 (Very Easy)
How long does it take?
1 to 3 minutes
Materials
- 1 square paper (15 x 15 cm is best)
- A flat surface to work on
Step-by-Step Instructions
If you are new to origami, learning basic folds will make this easier.
👉 Click here to master basic folds first!
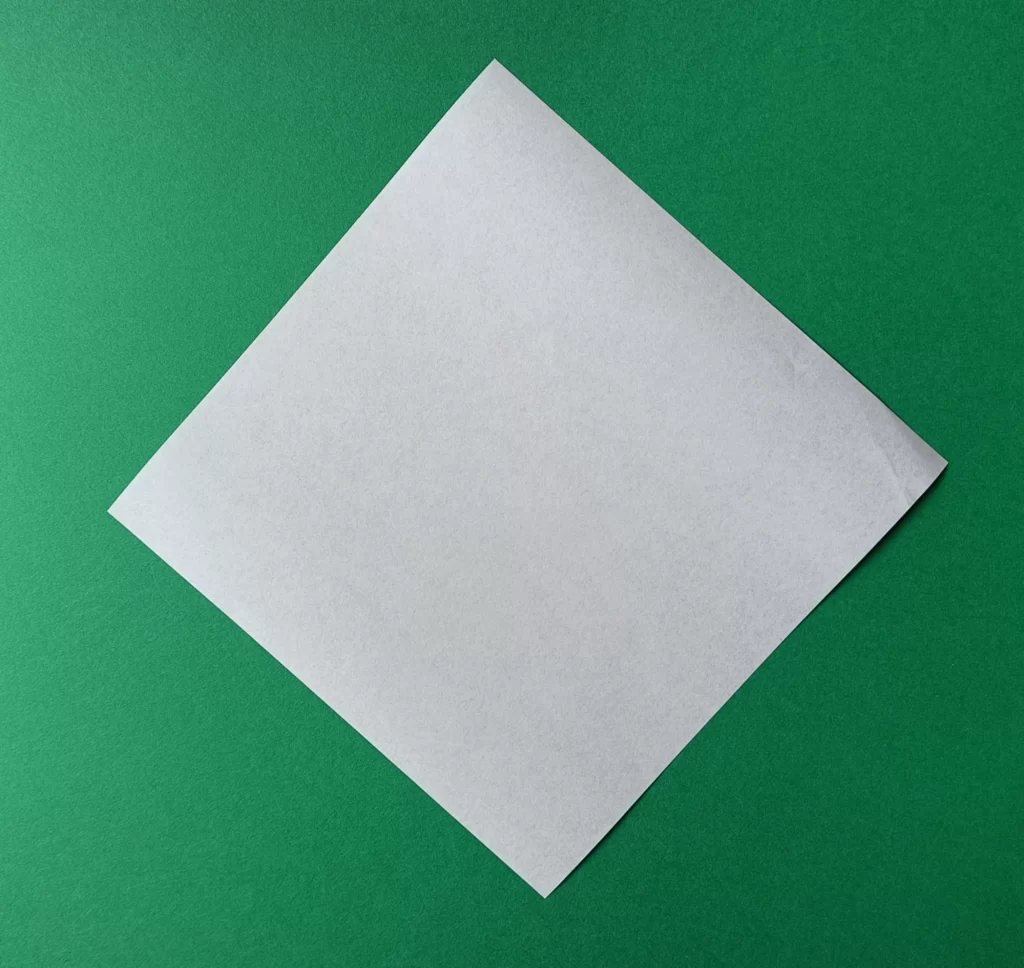
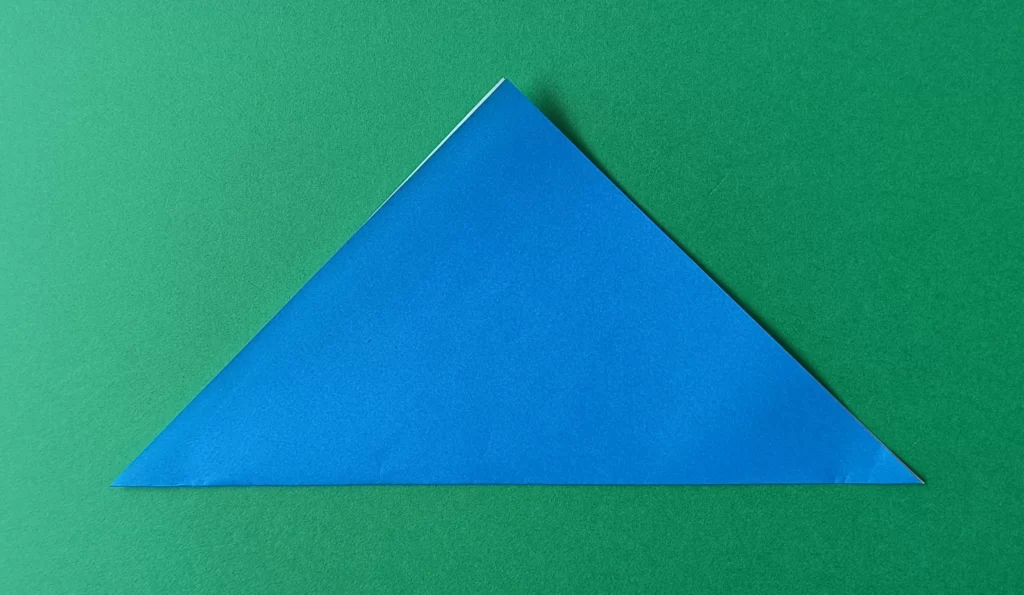
1.Place your square paper on the table like a diamond.
2.Fold the bottom corner up to the top corner.
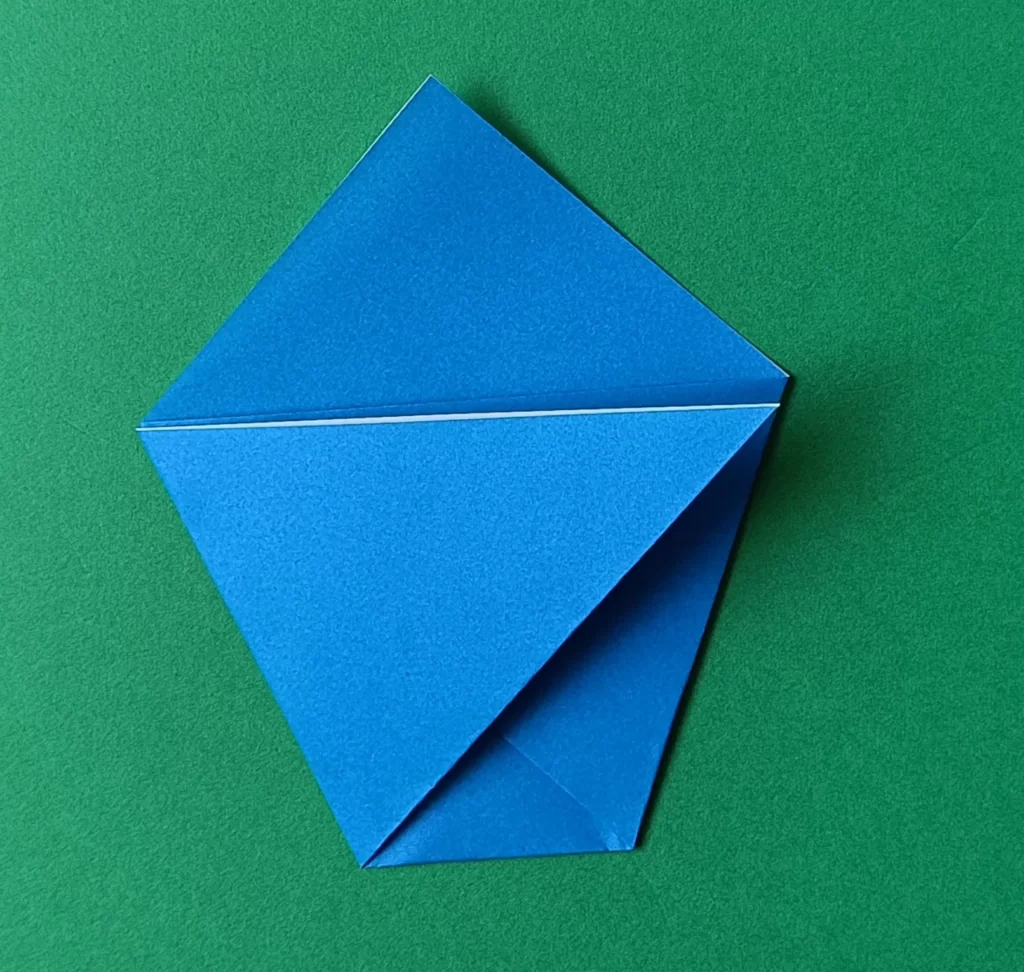
3.Fold the right corner to the left side.

4.Fold the left corner to the right side.
5.Fold only one top flap down.
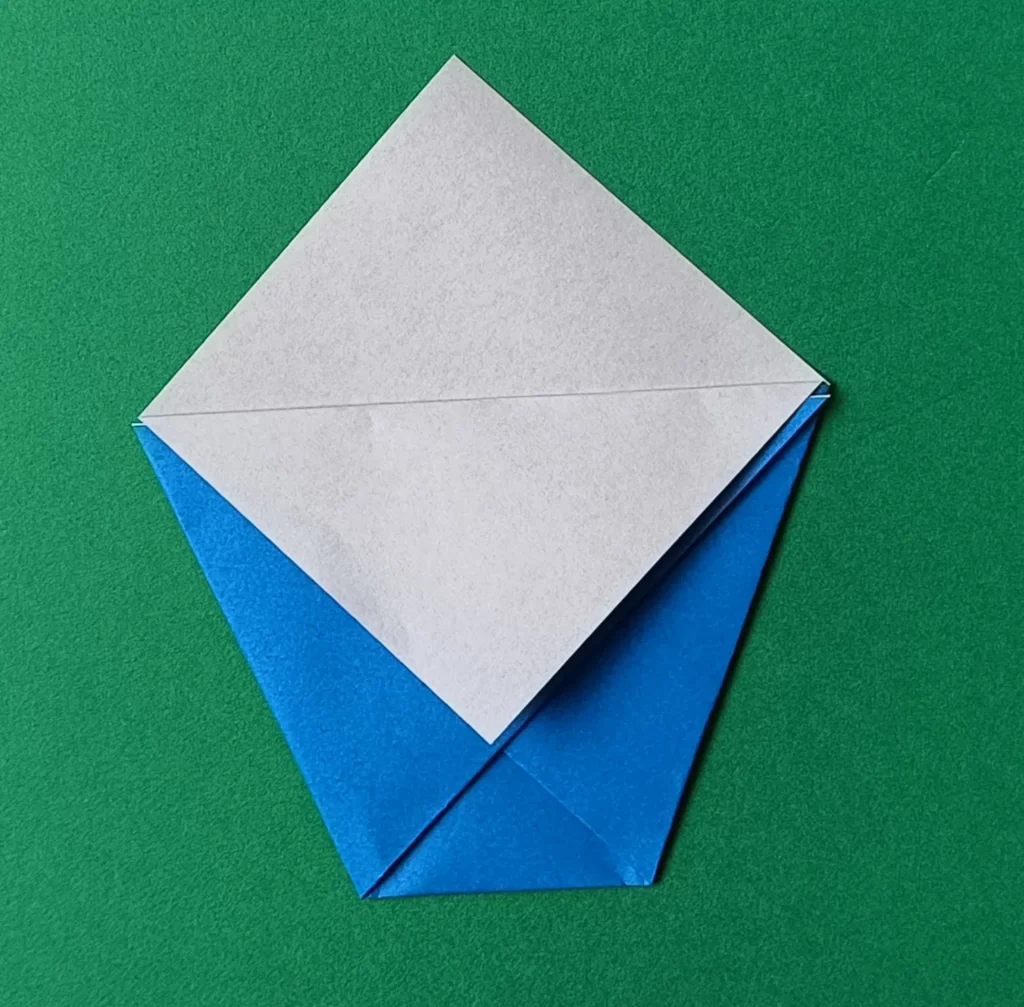
6.Turn it over and fold the other flap down.

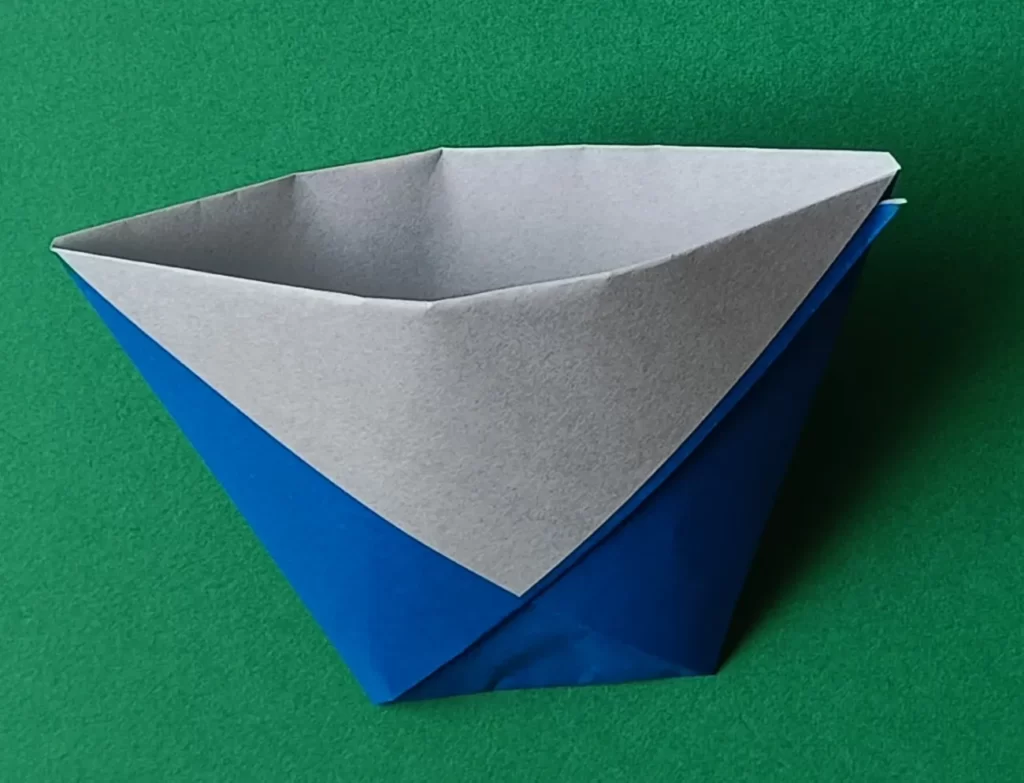
7.Open it gently.
Why This Origami is Good for Kids
- The cup can hold small snacks like berries or crackers during playtime
- It helps children understand how everyday objects (like cups) can be made from simple materials
- Kids can use it in pretend kitchens, tea parties, or outdoor games
Tips for Success
- Try wax paper if you plan to pour a little water inside
- Make sure both side corners are folded evenly so the cup stands straight
Common Mistakes
This model is very forgiving — even if your folds are slightly off, the shape stays intact, making it easy for beginners to complete.
Fun Ideas to Try
- Draw faces or patterns to turn your cup into a character
- Make several cups and use them for sorting beads or small toys
- Create a mini picnic and use your cups for pretend drinks
- Try different paper sizes to make big and tiny cups
- Decorate with stickers and give them as small handmade gifts
Fun Fact
Paper cups were once used by travelers long ago because they were easy to carry and could be thrown away after use!
In Japan, children often make these paper cups to hold small snacks during “Picnic Play” or even to collect small flowers in the garden. It is a classic “playful tool” known to every Japanese person!
Conclusion
Great job! You just made your own easy origami cup. It’s amazing how a simple piece of paper can turn into something you can actually use.
Keep folding and exploring new ideas. There are many more fun shapes waiting for you to try!
Try More Origami
Want to make more fun and useful things? Try these next!