Introduction
Do you like horses? Today, you will learn how to fold a paper horse that can stand on its own. It looks simple but has a proud shape, just like a real horse.
This easy origami horse is a great project for beginners who want to try something a little more exciting. It is fun to make and even more fun to play with after!
※ You will also use scissors for one small step, so please ask an adult to help if needed.
Want to explore more animals?
Explore more [Step-by-Step Origami Animals for Beginners] to build your paper zoo!
Difficulty Level
Level 2 (Easy)
How long does it take?
6 to 8 minutes
Materials
- 1 square paper (15 x 15 cm is best)
- A flat surface to work on
- A pair of scissors
Step-by-Step Instructions
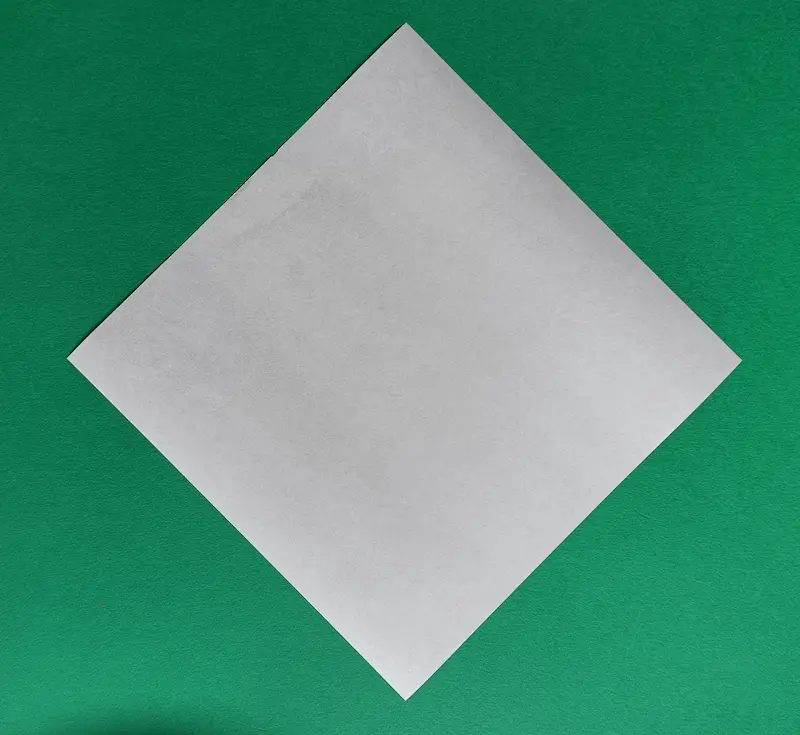
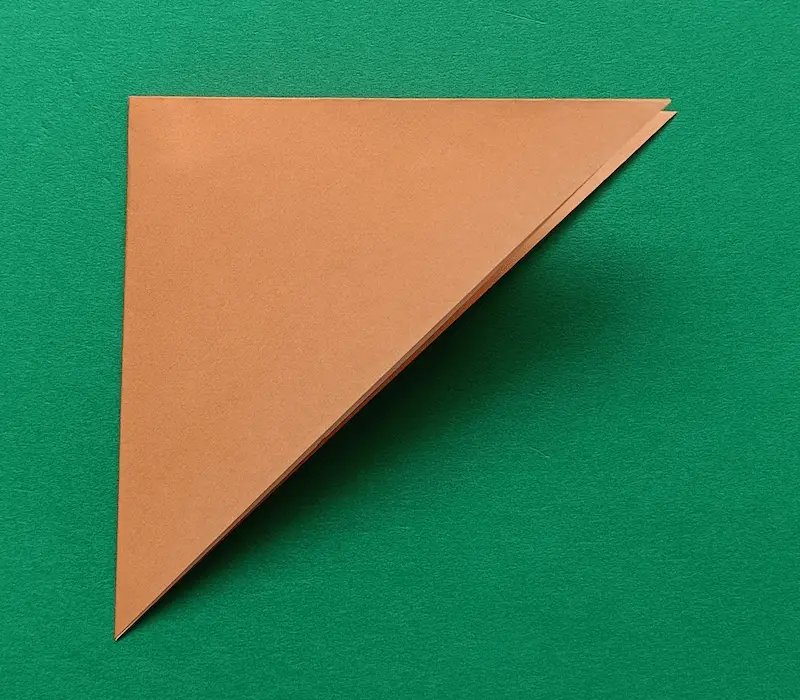
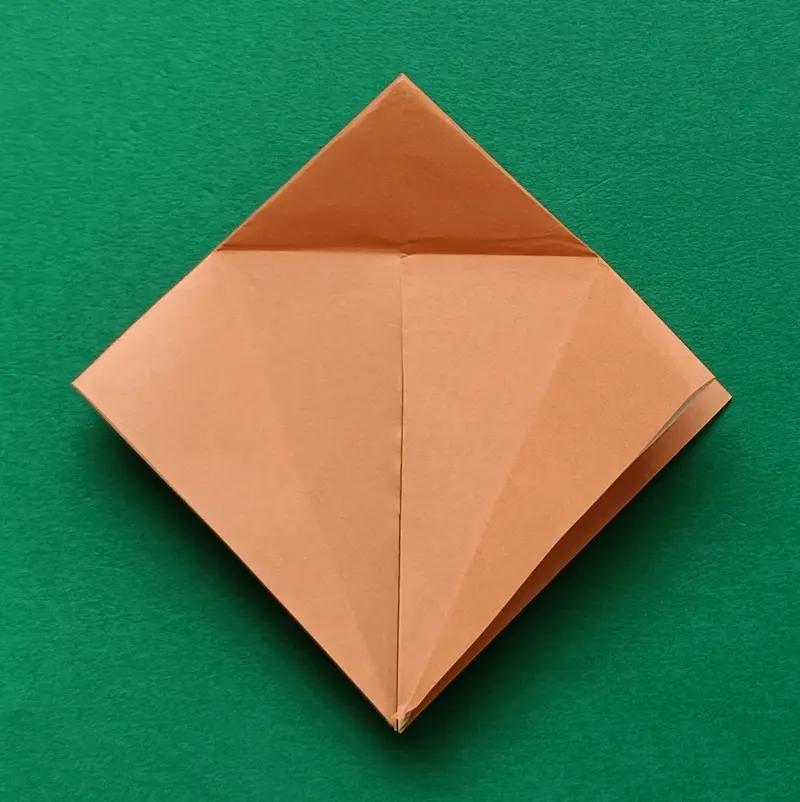
1. Place your paper on the table like a diamond shape.
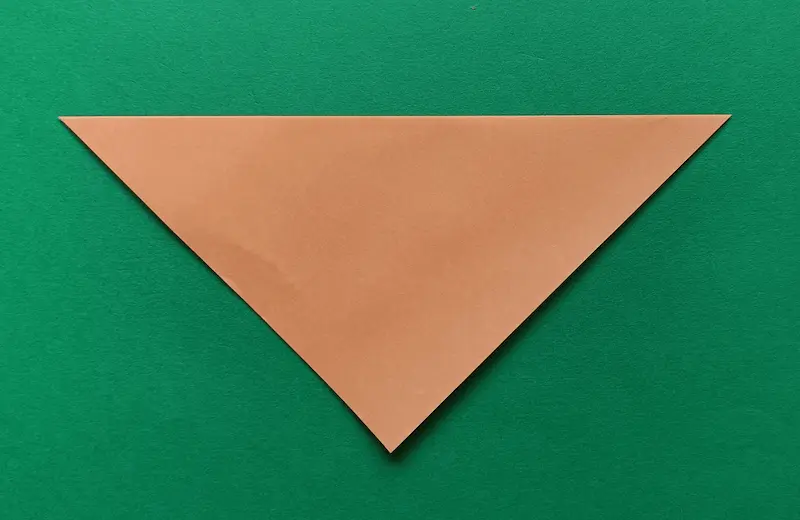
2. Fold the paper in half from top to bottom.
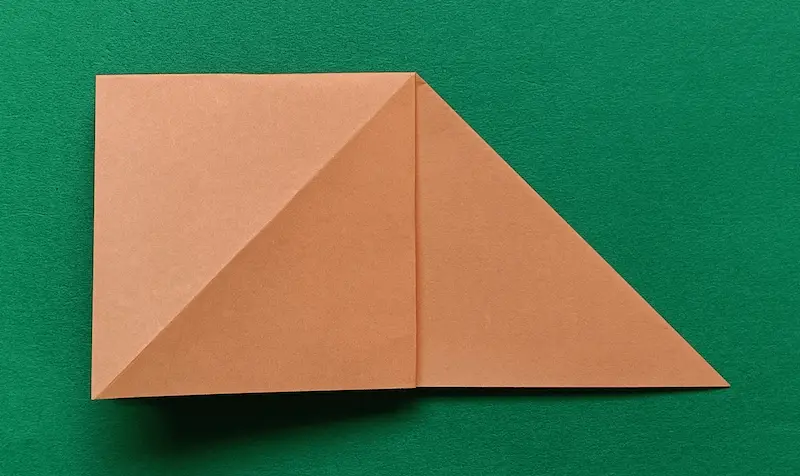
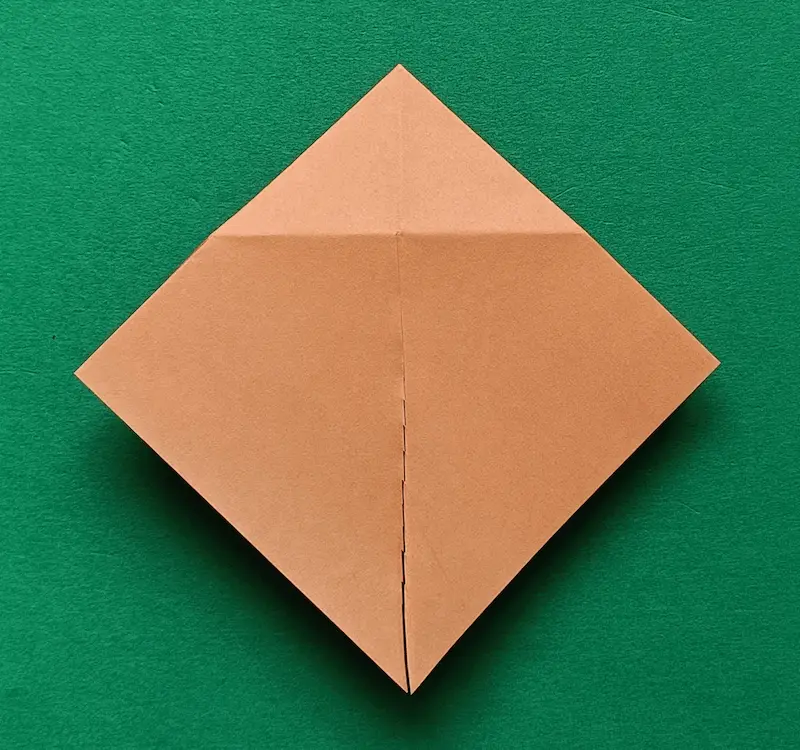
3. Fold the triangle in half again.
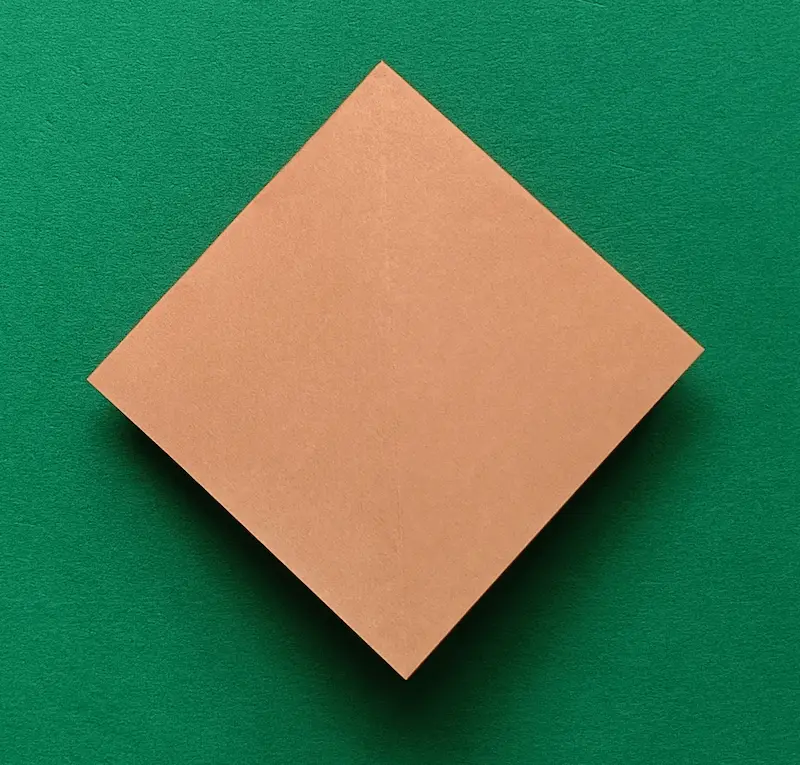
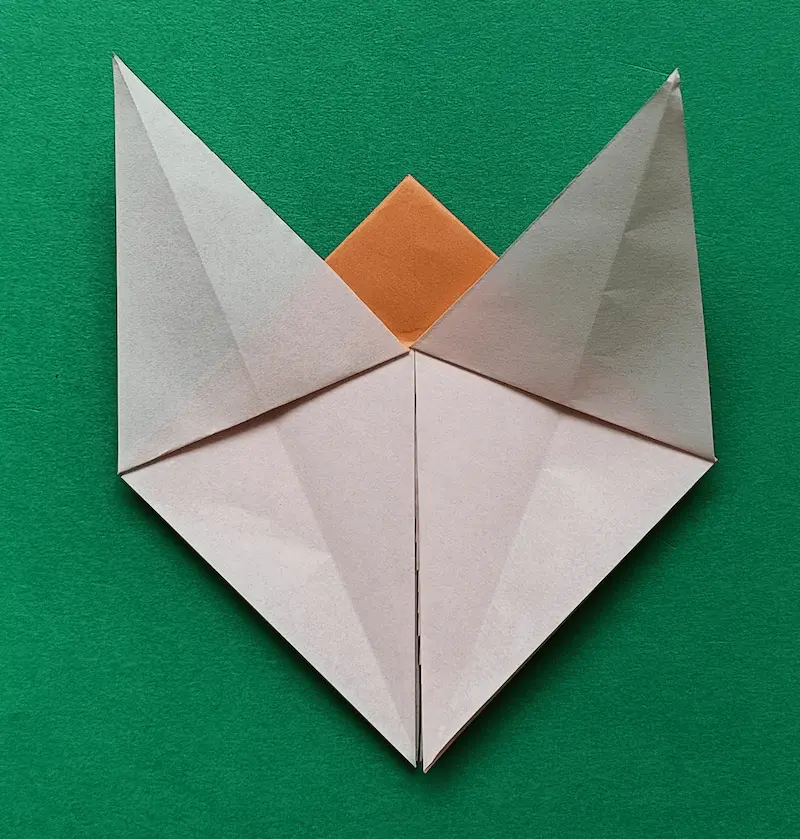
4. Put your finger in the top triangle, open it up, and flatten it.
5. Do the same on the other side.
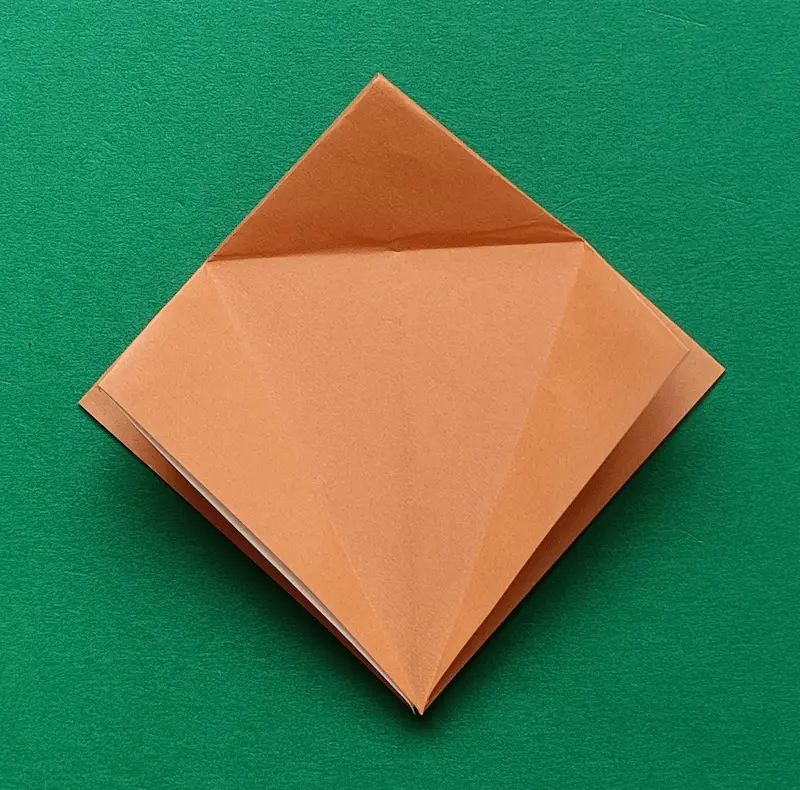
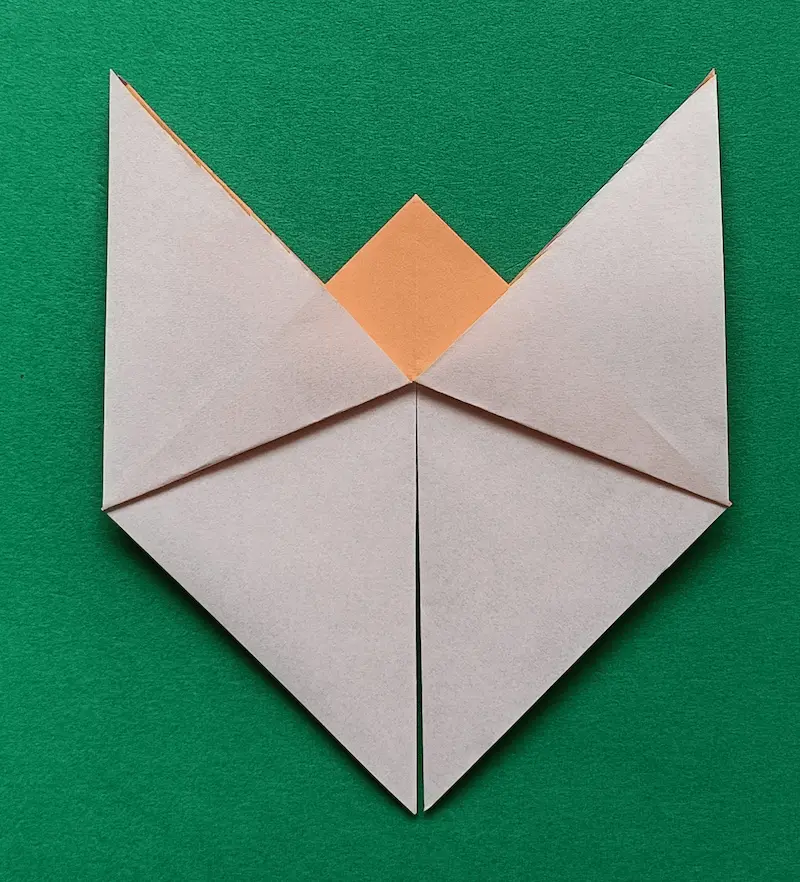
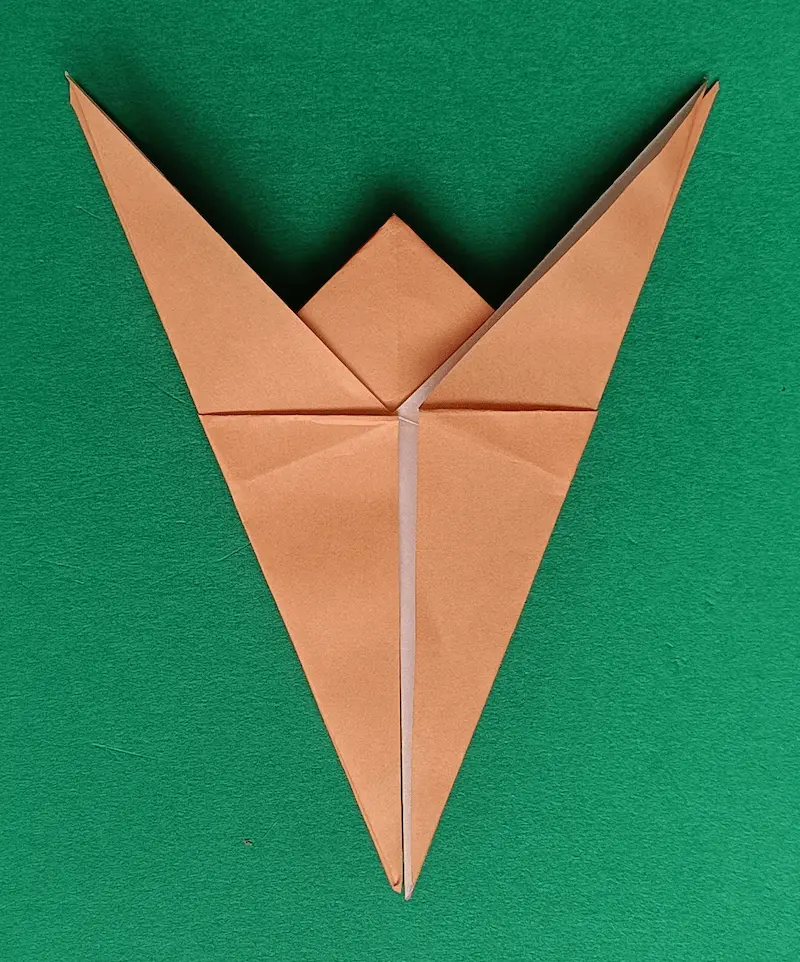
6. Make three crease lines like in the picture.
7. Cut from the bottom corner to the sideline. (Only the top layer!)
8. Do the same on the other side.
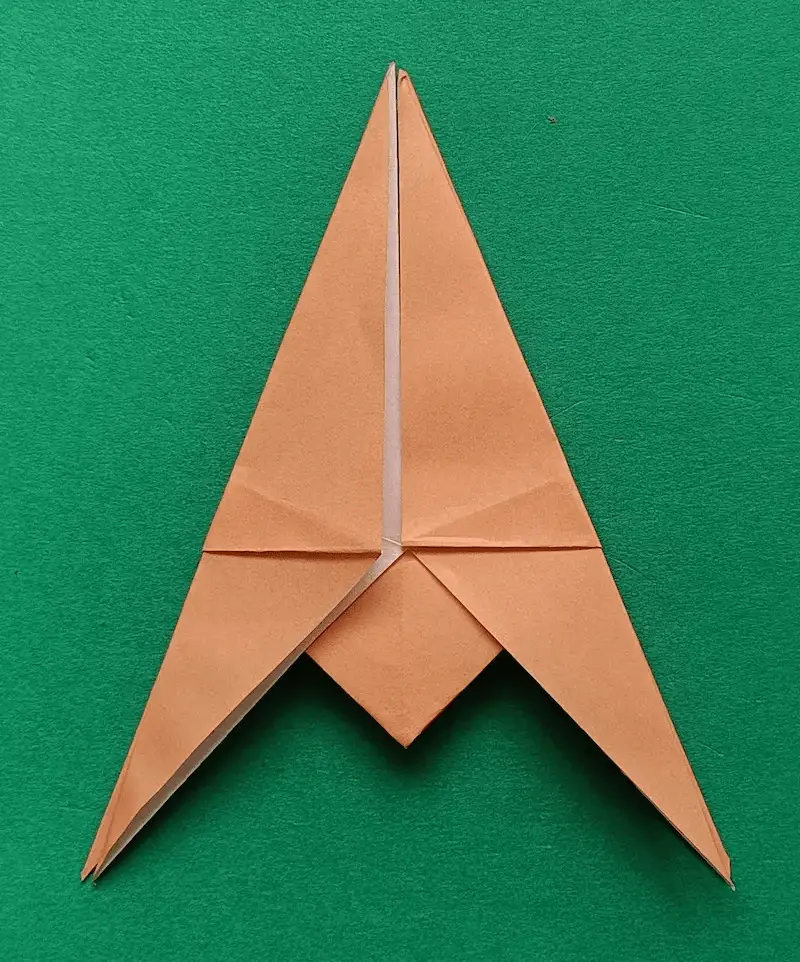
9. Open both sides into a diamond shape.
10. Do the same on the other side.
11. Fold the diamonds on both sides in half.

12. Do the same on the other side.
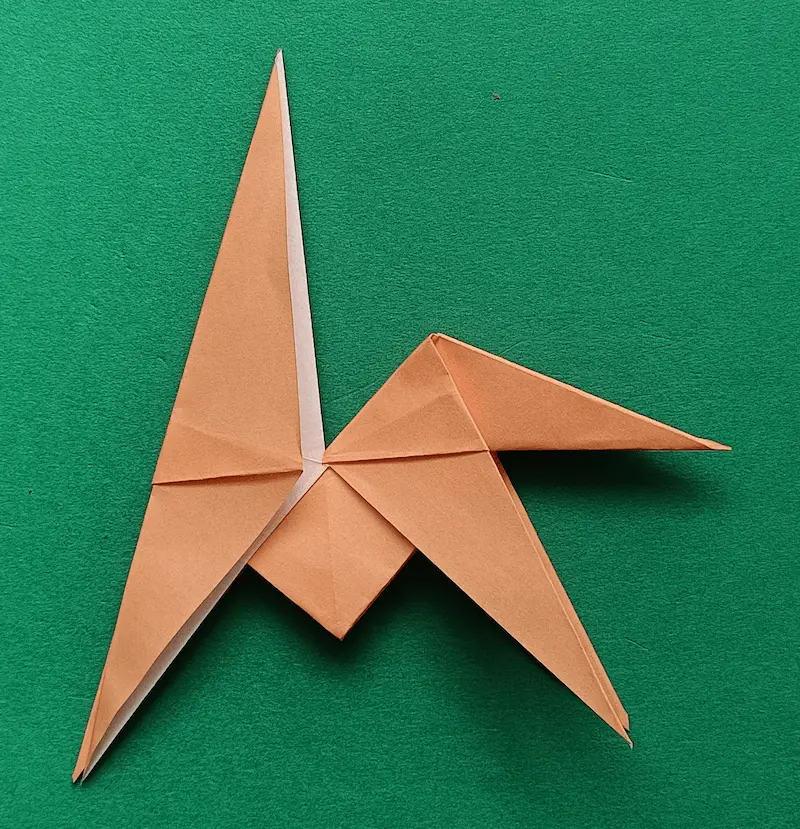
13. Turn it upside down.
14. Make an inside reverse fold at the right corner to create a tail.
(Not sure how? Click here to see how to make an Inside-reverse fold!)
15. Make a small inside reverse fold at the top corner to make the head.
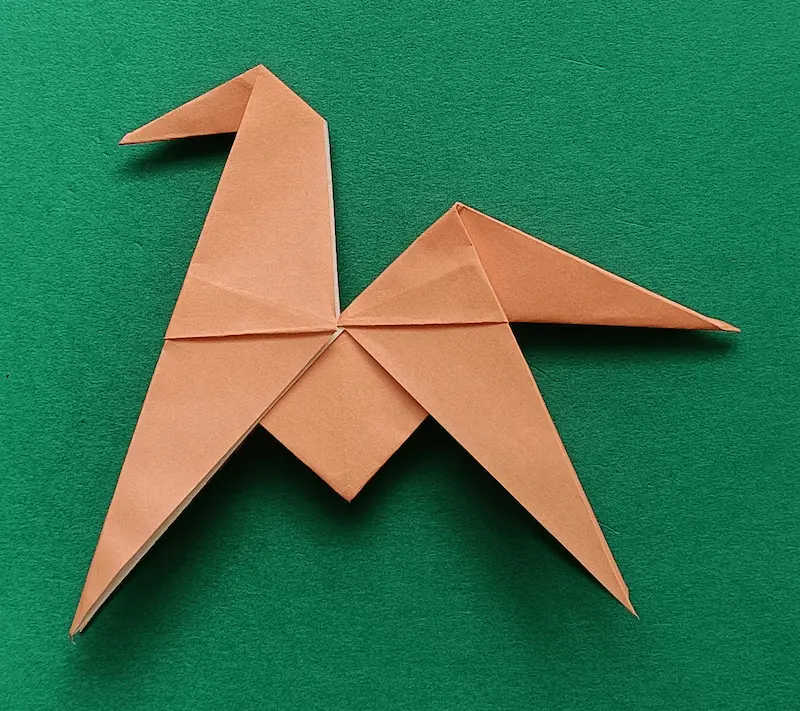
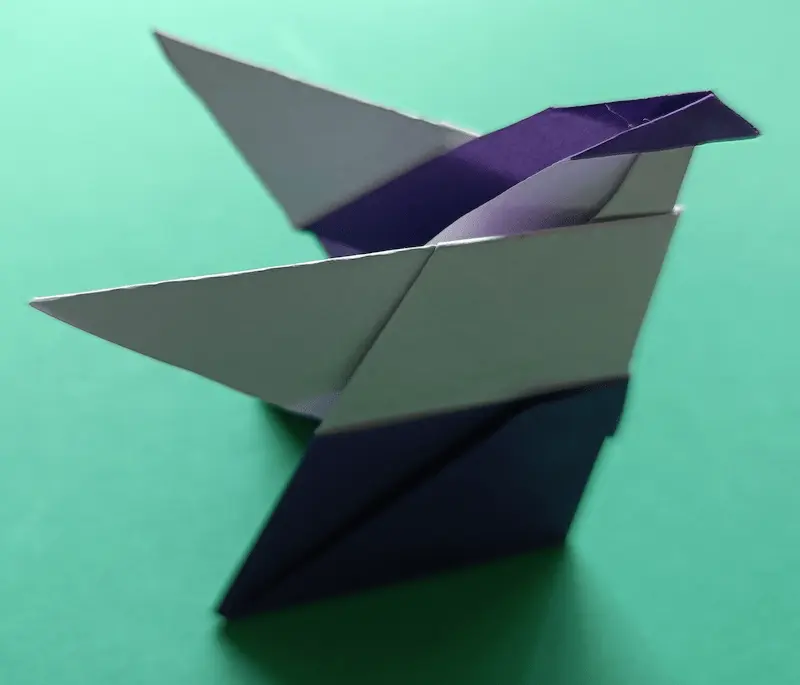
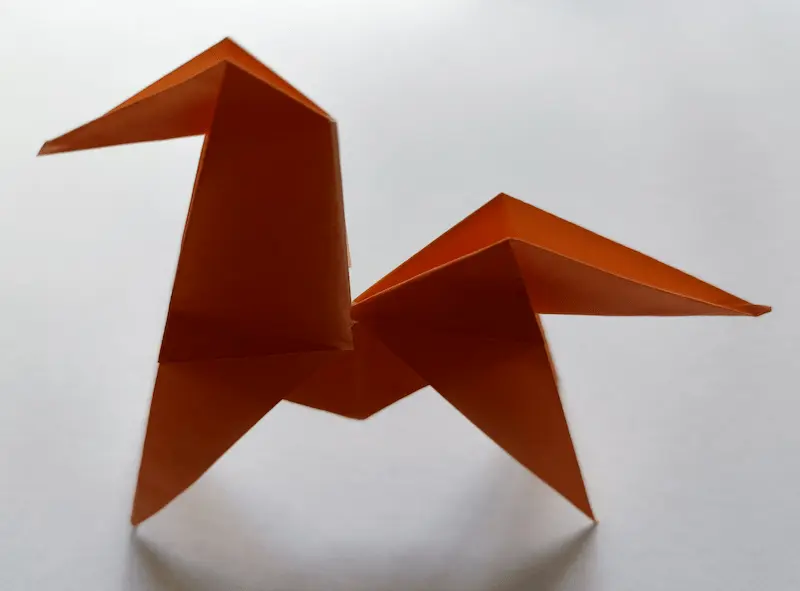
16. Stand it up, and you’re finished!
Why This Origami is Good for Kids
- Horses are known for running and strength, and this model lets kids imagine movement as they play with it
- The standing shape makes it feel like a real toy animal, not just flat paper
- It can be used in pretend farm scenes or storytelling games with other animals
Tips for Success
- Make sharp folds so your horse stands better
- Take your time shaping the head—it gives the horse its personality
- Try using brown or black paper to make it look more like a real horse
Common Mistakes
Q: It doesn’t stand up well.
A: In steps 8, 10, and 12, make sure the back side matches the front.
Fun Ideas to Try
- Make a whole family of horses in different colors
- Create a paper farm with fences and grass
- Turn your horse into a racing champion and give it a number
- Add small paper riders for storytelling adventures
Fun Fact
Horses can sleep both lying down and standing up! That is why your origami horse looks great when it stands.
In Japan, people long ago believed that horses were messengers of the gods. Even today, you can find small wooden boards called “Ema” with pictures of horses at shrines. People write their dreams and wishes on them, hoping they will come true!
Conclusion
You did a great job making your own paper horse. It may look simple, but it has a strong and lively shape. Try making more and create a whole herd!
Origami gets even more fun as you learn new models, so keep folding and exploring.
Try More Origami
Want to fold more cute animals? Try these next: